As someone who is perpetually concerned about a lack of security while surfing the web, I try my best to keep up on the latest zero-days, scams, spoofs and vulnerabilities that I may be susceptible to. I began to read about DNS spoofing and cache poisoning; an article from CloudFlare comes to mind. CloudFlare is one of the leading providers of website protection services for many of the web’s most well-known websites. They also have powerful services that help deflect DDOS attacks that can bring down web servers by overloading them with fake traffic pings, which lead to the downfall of those web services or servers.
Back to the topic at hand though, what is DNS?
DNS stands for Domain Name Service and is critical to the overall functionality of the Internet.
Every website on the internet is represented by a series of numbers called an IP Address. For example, Google.com’s IP Address is 172.217.14.228; however, trying to remember Google’s IP address (or any other site’s for that matter) when you want to visit their site would be very cumbersome.
Enter DNS: Which translates an easily memberable URL into an IP address (i.e. User types: “Google.com” into their browser and DNS knows that this should point the use to 172.217.14.228).
Thinking about how DNS works a little more, one may think, what happens if the DNS server that translates these requests gets compromised? Or, queries from my browser are being sent to my ISP’s DNS servers in plain text, creating a privacy issue for me as I browse the internet.
At this point, readers are probably thinking – “Who cares? If you’re not doing anything wrong, you have nothing to worry about.” This is a great point; however in my opinion, my ISP does not need to know that I went to YouTube.com 7 times yesterday afternoon.
Back to CloudFlare.
Among the list of services outlined above, CloudFlare also provides secured and encrypted DNS services. But how does one go about accessing those services in lieu of falling back to the unsecured default DNS servers from one’s ISP?
We will outline two methods.
Method 1 – Firefox Browser:
The first is the easiest method. Download Mozilla’s Firefox browser here. Within Firefox, there is a setting to enable DNS over HTTPS, which will encrypt your DNS queries via CloudFlare over HTTPS. Thus, all of your DNS queries in Firefox (i.e. Translating from Google.com to 172.217.14.228) will always be routed through CloudFlare’s DNS Resolver Services and encrypted while referring you to your destination. To enable this setting, click the “hamburger” menu (three lines stacked on top one another) at the top right of the window and select “Options.” With “General” selected, scroll to the bottom until you see “Network Settings.” Then, check “Enable DNS-over-HTTPS” and ensure Cloudflare (Default) is selected. In most recent versions of Google’s Chrome browser, DNS over HTTPS is an option available to users as well…
…But what if you want this level of encryption across your entire home network. That is where Method 2 comes in…
Method 2 – Virtual Server Environment:
Method 2; however, (though more challenging) is a lot more fun as it involves building your own virtualization server (a/k/a Hypervisor) using Proxmox, a free and open-source virtualization software platform. Please note that you can also just install an instance of Ubuntu Server (Linux) directly to “bare-metal” (i.e. to your hard/solid state drive) in lieu of using a Hypervisor (virtual environment operating system) to host each instance of Ubuntu Server. However, using Proxmox will allow for more flexibility should you choose to add more virtual environments to host more resources on your network.
After Proxmox, we will then install a virtual instance of Ubuntu Linux (also free and open-source). As a cheaper alternative, nearly the same steps can be taken on a Raspberry Pi using Raspbian Linux.
Regardless of what hardware you choose, the end-goal is your own fully operational private DNS forwarding server utilizing CloudFlare’s DNS-over-TLS encryption to ensure requests are not sent over the internet in plain-text.
On May 2nd, 2020, I jumped on NewEgg to start this project and ordered the following parts:
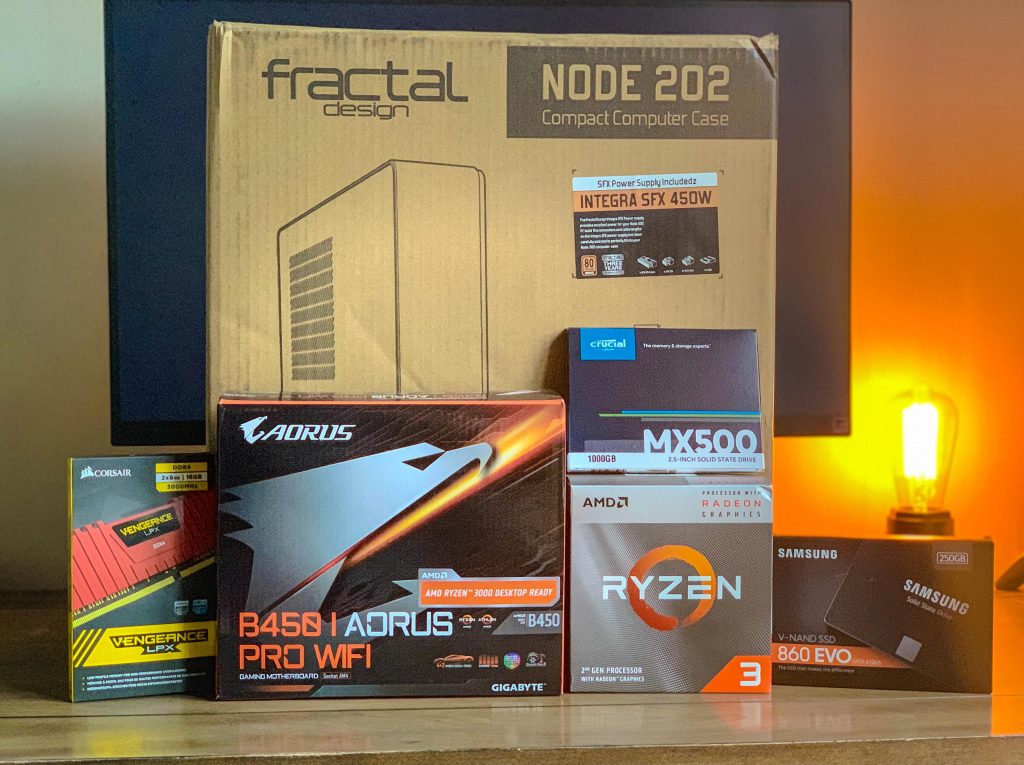
- Case: Fractal Design Node 202 (Slim Case for discrete placement. Includes 450W power supply.)
- Motherboard: Gigabyte B450 I Aorus Pro (Mini-ITX form factor)
- CPU: AMD Ryzen 3 3200 G Processor 3.6 GHz (Turbo Boost to 4.0 GHz and on-chip graphics)
- Memory: 32 GB Corsair Vengeance LPX 2×16 GB DDR4 3200 SDRAM
- Storage: 250 GB Samsung 860 EVO SSD (For Operating System)
- Storage: Crucial MX500 1TB SSD (For Virtual Machine Storage)
- Operating System: Proxmox 6.1
- Virtual Machine Image Used: Ubuntu 20.04 LTS
This is just a sample build that I used and has been working well. However, lots of memory is critical for this project. I have 4 different Ubuntu Virtual Machines (VMs) running and often, that requires nearly 70% of 32 GBs to be utilized. Also, for some motherboards, it is necessary that virtualization is manually enabled (commonly referred to a Intel VT or AMD-V/SVM Mode in your BIOS settings). On some systems it is disbled by default and this will cause errors when launching a VM .
- Once your new system built and powered on, go to your existing Mac, Linux or Windows system. You will need to download balenaEtcher, which is a tool that makes a USB flash-drive bootable. A copy of this tool can be downloaded at: https://www.balena.io/etcher/
- After you have downloaded balenaEtcher, you will need to obtain an ISO image of Proxmox. At the time of writing this, version 6.2 of Proxmox is available in ISO format. Again, this is free and be obtained from https://www.proxmox.com/en/downloads.
- Once balenaEtcher finishes writing to the USB flash-drive, plug it into your new system. It will need to be hooked up to a monitor, keyboard and mouse for the initial setup, but can be run “headless” after this.
One of the best tutorials providing the greatest amount of detail was created by the “Craft Computing” channel on YouTube. Use the following link for an installation and configuration tutorial of Proxmox: https://youtu.be/azORbxrItOo
It should also be mentioned that “Techno Tim” has a great Proxmox install video too: https://youtu.be/7OVaWaqO2aU
After you view this tutorial, proceed to https://ubuntu.com/download/server to download Ubuntu server.
A great tutorial that outlines setting up an Ubuntu Server VM on Proxmox was made by the “Techno Tim” Youtube channel. I recommend using the following link for an installation and configuration guided tutorial: https://youtu.be/YR9SNDD8WB4
A few things to note when viewing this tutorial and then setting up your VMs with Ubuntu Server 20.04 LTS:
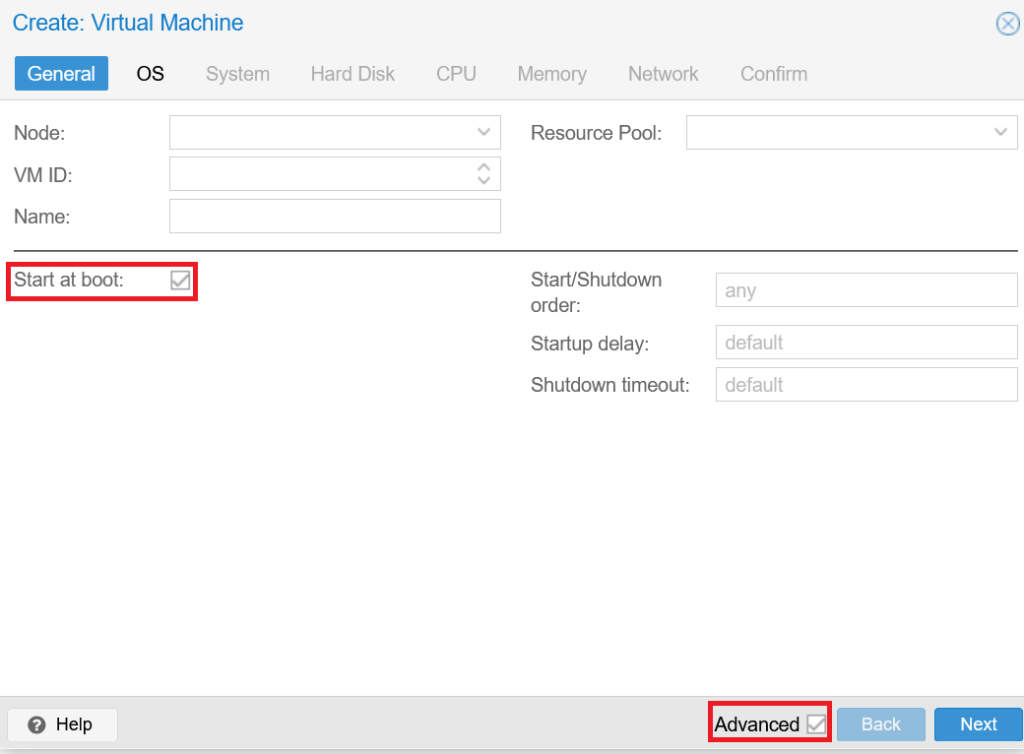
- Upon accessing the “Create: Virtual Machine” setup wizard, under “General” be sure to check “Advanced” at the bottom right and then select “Start at boot.” This way, your server will always automatically load if Proxmox is ever rebooted.
- Depending upon the storage available in your system, it is recommended to select at least 32GB.
- Depending upon the processor you selected for your build, I would recommend a 1 socket, 2 core setup.
- For memory I would also recommended selecting a minimum of 1024 MiB and a max of 4096 MiB.
- For the Ubuntu setup, you can follow the recommended YouTube tutorials verbatim, however, it is highly recommended that the Open SSH Server function is installed in order to enable access to the server from any Command Line Interface (CLI). If you use Windows, PuTTY can be downloaded for free so that you can SSH into your new server VM. PuTTY can be downloaded here.
- It is also critical that you set a Static IP address for your Ubuntu VM install. This is a prompt in the setup that can be selected. It is more than likely that your home network is on a /24 subnet. So, if your PCs internal IP address is 192.168.1.15 for example, then you would enter a subnet of 192.168.1.0/24.
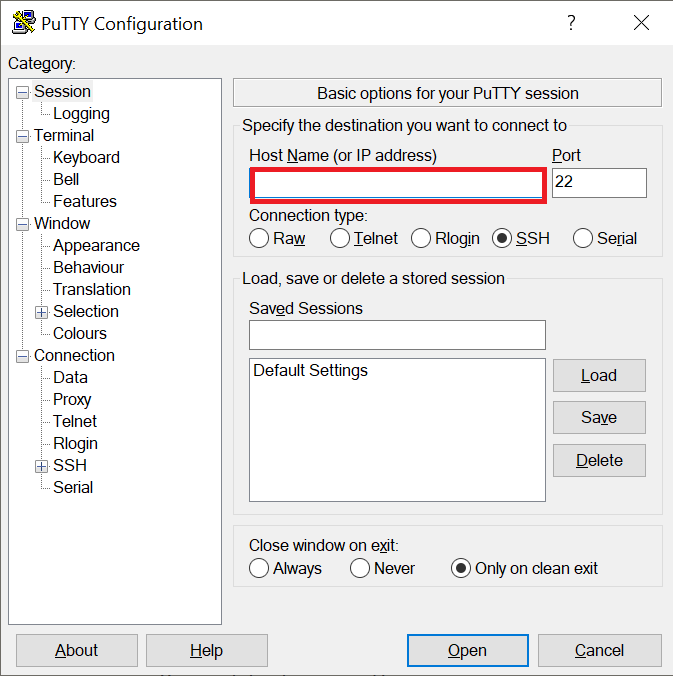
Using your SSH client (PuTTY), type the IP address you assigned to your Ubuntu VM. You can leave the port set to 22 and then click open.
- Once connected, you will be presented with a “login as:” prompt. Here you will want to type in the username you assigned to the Ubuntu Server at setup followed by [Enter]. Then, do the same for the user account’s password (no “*” will be shown in the CLI when entering your password), followed by [ENTER].
- When you enter your server’s login credentials, click “Yes” when prompted about the server host key not being cached in the registry. This is fine as we know we are connecting to a known server (the one we setup).
- After a successful login in, we will want to ensure we have the latest updates to our server. To obtain these, you will need to enter the following command and then [ENTER] :
- sudo apt update && sudo apt upgrade -y
- You will then be prompted to enter your password once again followed by [ENTER].
- Once the progress bar reaches 100% and you are left back at the prompt with a blinking cursor, it will be a good idea to reboot. To do this, type: sudo reboot (followed by your password and then [ENTER].
- After about a minute or so, log back in utilizing the instructions outlined in step one above.
Now that you are logged back in, we will need to re-configure Ubuntu Server’s default DNS settings. To do this, run the following commands (press [ENTER] after each step):
- sudo systemctl stop systemd-resolved.service
- sudo systemctl disable systemd-resolved.service
- Then, we will need to change the configuration file for the DNS Resolver. To do this, type sudo nano /etc/resolv.conf
- This will bring you into the NANO text editor.
- Move your cursor down to the line that says “nameserver” and change this to show 1.1.1.1
- Press Ctrl+x on the keyboard
Enter Unbound.
Unbound is another free utility that will enable us to forward DNS queries to CloudFlare.
- To install, type the following command: sudo apt install unbound dnsutils
- Next we will need to edit the configuration file and input all settings. To edit the configuration file, we will need to access the NANO text editor once more as follows:
- Sudo nano /etc/unbound/unbound.conf
- Look for the line that shows: include: “/etc/unbound/unbound.conf.d/*.conf” and place a # symbol before the word “include:.” This will comment this particular line out.
Now we will input the following settings into this file (Comments column below is for reference purposes only):
| Configuration | Comments |
|---|---|
| server: interface: 0.0.0.0 do-tcp: yes do-udp: yes access-control: 0.0.0.0/0 allow harden-dnssec-stripped: yes harden-glue: yes private-address: 192.168.1.0/24 private-address: 127.0.0.0/8 prefetch: yes rrset-roundrobin: yes qname-minimisation: yes tls-cert-bundle: /etc/ssl/certs/ca-certificates.crt forward-zone: name: “.” forward-tls-upstream: yes forward-addr: 1.1.1.1@853#cloudflare-dns.com forward-addr: 1.0.0.1@853#cloudflare-dns.com | Interface: Should point to the server itself (127.0.0.1 or 0.0.0.0 is the IP that points back to the server). do-tcp: Set to ‘yes’ so that the server will handle DNS forwarding over TCP protocol. do-udp: Set to ‘yes’ so that the server will handle DNS forwarding over UDP protocol. access-control: 0.0.0.0/0 allow will point to all networks. harden-dnssec-stripped & harden-glue: Set to ‘yes’ to limit DNS query fraud/redirection. private-address: As was the case in “access-control” list internal IP ranges and subnets only so the server can delineate. prefetch: Allows for DNS caching of frequently visited DNS queries (i.e. google.com) rrset-roundrobin: Inventories/indexes DNS queries for faster retrieval in the future. qname-minimisation: Helps server to run as efficiently as possible by reducing data required to query. tls-cert-bundle: Used for encryption purposes. forward-zone: Copy verbatim to ensure encryption via CloudFlare works properly. |
- Once configuration entries are entered into unbound.conf, press Ctrl + x on the keyboard followed Y.
- Then, press [ENTER] on the keyboard to confirm the changes.
- Reboot the server using sudo reboot followed by [ENTER].
Now that your server is up and running, it is important to keep it updated by running the following commands as frequently as possible (recommend at least weekly):
- sudo apt update && sudo apt upgrade -y
- Followed by sudo reboot
You can now start pointing each of your individual computers to the IP address of your new DNS server. However, you can use your router to automatically always point all devices to your internal DNS server, which is the recommended approach.
As each router is a little different, you should consult your router’s manual for more information on pointing it to the specific IP address for your DNS server.
Finally, to test that your encryption is working, head to https://1.1.1.1/help. You should see the following, which will confirm you are using CloudFlare and using DNS over TLS (DoT).
